
For 2 years I've been working with Go, building new projects with it and it's usually my first choice when I have to build a new backend project.
In this article I will show you how to build a production-ready GraphQL API with tips don't avoid errors I made when I spent hours building GraphQL APIs in Go. This architecture and setup is my current go-to one and is the result of many iterations.
In this article I won't see Go basics in-depth, I imagine that you already have some experience with the language.
The code of this article is available on my Github.
Summary
- Requirements
- Project setup
- Choosing a GraphQL framework
- Creating the GraphQL API
- Understanding code generation
- Implementing mutations and queries
- Choosing an SQL ORM
- Creating our models
- GraphQL + ORM
- Playing with our API
- Final note
Requirements
Since we will use Go, make sure you have Go installed on your machine. You can check the official page on how to install it.
I'm using the last Go version at this date which is 1.16.5. The only requirement is that your Go version supports Go Modules.
Project setup
First, you have to create a new directory containing your code and then create a new go module. For this example, I'm using my personal Github repository, but make sure to replace it with your repository name.
$ mkdir go-graphql-example && cd go-graphql-example

# Create new go module
$ go mod init github.com/shellbear/go-graphql-example
$ touch main.go
The
go mod init command will generate a go.mod at the root of your project. This file contains the dependencies of your project and specifies some information about your module:module github.com/shellbear/go-graphql-example go 1.16
Then we will create our main. For now, we will just create an empty main to test that everything works fine:
# main.go

package main

import "fmt"

func main() {
	fmt.Println("GraphQL example")
}
We can run our code with the
go run command.$ go run . GraphQL example
Your project is now setup, we now have to choose a GraphQL framework and setting up our API.
Choosing a GraphQL framework
The three most popular GraphQL framework (for server-side) in Go are the following:
I personally tested all of them but I ended using gqlgen. I personally love the API, tooling, and code generation. I used it for many projects that run in production and I can tell you that's it's really stable and makes easy the GraphQL API development in Go.
gqlgen is a Schema first framework, which means that you will write some GraphQL schema first and then gqlgen will generate the Go types and functions that will match your GraphQL schema. This is really convenient and everything is strictly typed, zero
interface{}! If you make changes in your GraphQL schema they are also changed in your Go code.I really recommend you to use gqlgen if you want to setup a GraphQL API in Go. This is the one we will use for this example.
Creating the GraphQL API
To easily setup a GraphQL with gqlgen you can follow the official instructions. But here are the setup process:
First, you need to fetch the gqlgen module and then run the init command to generate all the basic configurations for our GraphQL API.
$ go get github.com/99designs/gqlgen
$ go run github.com/99designs/gqlgen init
This will create several files and folders in your project:
$ tree
.
├── go.mod
├── go.sum
├── gqlgen.yml              # The gqlgen config file
├── graph
│  ├── generated            # The generated runtime
│  │  └── generated.go
│  ├── model                # The user defined or generated graph models.
│  │  └── models_gen.go
│  ├── resolver.go          # The root graph resolver type
│  ├── schema.graphqls      # Our GraphQL schema
│  └── schema.resolvers.go  # The resolver implementation for schema.graphqls
├── main.go
└── server.go               # The entry point to your app
The
server.go file is just a main that will create an HTTP server, listen on a port, and expose our GraphQL API and a Playground to visually make GraphQL requests.By convention, we will rename this file
main.go since we will use it as our main. To run it, you can use go run command:$ mv server.go main.go $ go run . 2021/06/23 17:34:39 connect to http://localhost:8080/ for GraphQL playground
If you open http://localhost:8080/ in your browser, it will automatically open the GraphQL playground and start making requests.
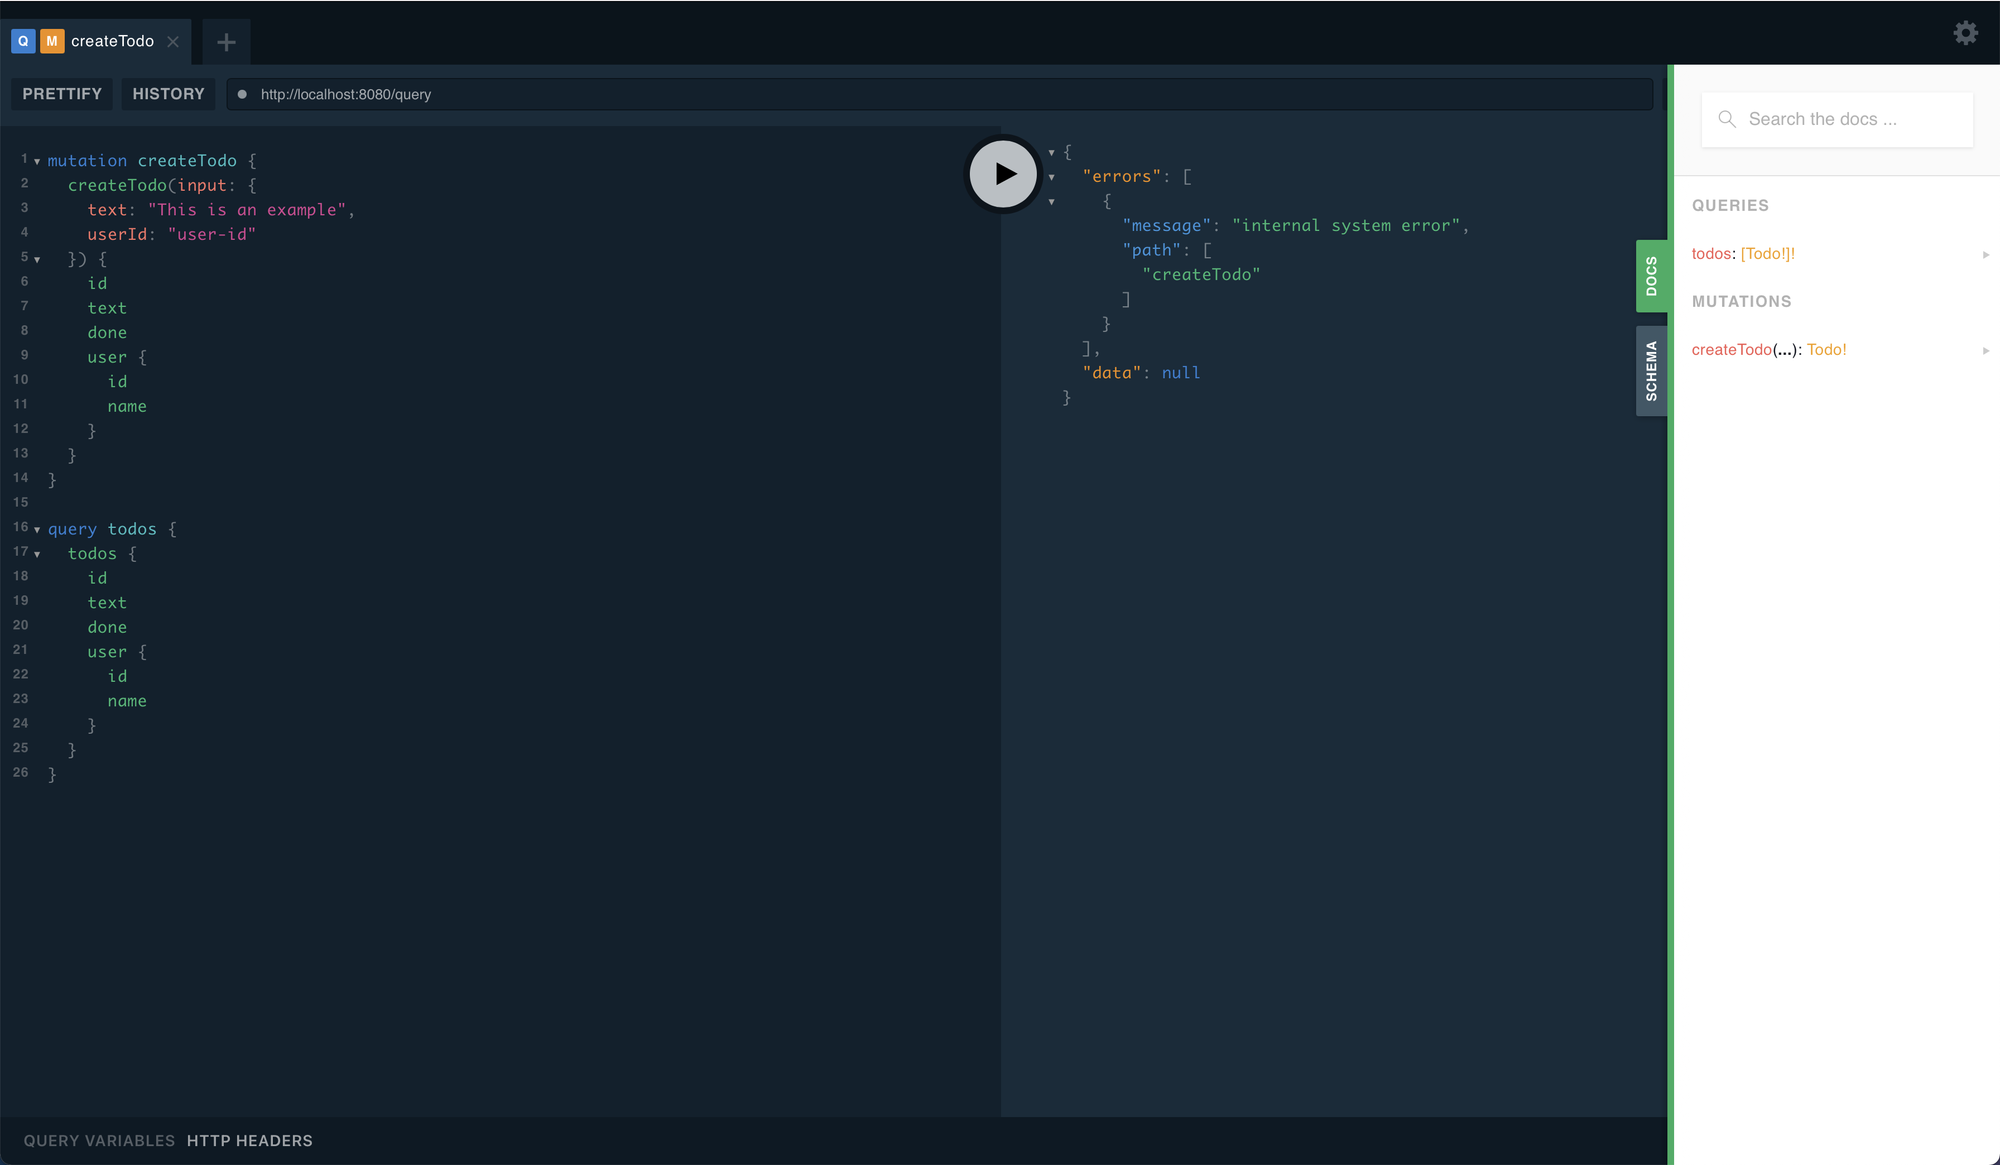
Wait, what? If we try to run any
mutation or query we have an internal system error.This is because our API is generated but you now have to define your query and mutation resolvers. These resolvers are some functions that will automatically be generated by gqlgen.
Understanding code generation
Since gqlgen is a schema first framework, everything starts by defining a GraphQL schema. There is a generated one
graph/schema.graphqls:# GraphQL schema example # # https://gqlgen.com/getting-started/ type Todo { id: ID! text: String! done: Boolean! user: User! } type User { id: ID! name: String! } type Query { todos: [Todo!]! } input NewTodo { text: String! userId: String! } type Mutation { createTodo(input: NewTodo!): Todo! }
This schema is just an example, you should replace it with your own GraphQL schema. For this project we will update it has the following:
# GraphQL schema example
#
# https://gqlgen.com/getting-started/

type Todo {
  id: ID!
  text: String!
  done: Boolean!
  user: User!
}

type User {
  id: ID!
  name: String!
}

type Query {
  todos: [Todo!]!
  userTodos(name: String!): [Todo!]!
}

input NewTodo {
  text: String!
  userName: String!
}

type Mutation {
  createTodo(input: NewTodo!): Todo!
}
For each
*.graphqls file inside the graph folder, gqlgen will generate a *.resolvers.go file containing the Queries, Mutations...schema.graphqls→schema.resolvers.go
This is defined in your
gqlgen.yml at the root of your project:# Where are all the schema files located? globs are supported eg src/**/*.graphqls schema: - graph/*.graphqls ....
This config specifies that our GraphQL schemas are all files that match the glob
graph/*.graphqls. Of course, you can add entries or modify this glob to change the folder, file extension... In this example, we will keep the default config.Now if you go to
graph/model/models_gen.go you will see that generated file contains all the types we defined in our GraphQL schema:// Code generated by github.com/99designs/gqlgen, DO NOT EDIT. package model type NewTodo struct { Text string `json:"text"` UserID string `json:"userId"` } type Todo struct { ID string `json:"id"` Text string `json:"text"` Done bool `json:"done"` User *User `json:"user"` } type User struct { ID string `json:"id"` Name string `json:"name"` }
There is the
NewTodo input we defined in our Schema and the Todo and User type. If gqlgen doesn't find these types in your Go code it will generate them by default. So we don't have to manually create these types. And finally the
graph/schema.resolvers.go file:package graph // This file will be automatically regenerated based on the schema, any resolver implementations // will be copied through when generating and any unknown code will be moved to the end. import ( "context" "fmt" "github.com/shellbear/go-graphql-example/graph/generated" "github.com/shellbear/go-graphql-example/graph/model" ) func (r *mutationResolver) CreateTodo(ctx context.Context, input model.NewTodo) (*model.Todo, error) { panic(fmt.Errorf("not implemented")) } func (r *queryResolver) Todos(ctx context.Context) ([]*model.Todo, error) { panic(fmt.Errorf("not implemented")) } func (r *queryResolver) UserTodos(ctx context.Context, name string) ([]*model.Todo, error) { panic(fmt.Errorf("not implemented")) } // Mutation returns generated.MutationResolver implementation. func (r *Resolver) Mutation() generated.MutationResolver { return &mutationResolver{r} } // Query returns generated.QueryResolver implementation. func (r *Resolver) Query() generated.QueryResolver { return &queryResolver{r} } type mutationResolver struct{ *Resolver } type queryResolver struct{ *Resolver }
As I told you, each
*.graphqls will generate a corresponding *.resolvers.go. So this file implements the Queries and Mutations of our schema.graphqls. This is the core of your GraphQL API. If you see the functions inside these resolvers, we can find the CreateTodo mutation and the Todos and UserTodos queries.But these resolvers are by default not implemented, gqlgen only generates the function definition and lets an empty body. This is normal, you are responsible for implementing the code logic to perform the Mutation or the Query.
Choosing an SQL ORM
In this example, we want to keep our Todos inside a database. To easily query, insert and delete rows in our database we will use an ORM. It will be responsible of generating the SQL queries for us.
The two best options for me are:
These two ORMs are popular. Gorm is a more mature ORM and is maintained by a Go developer and the community since 2013. Ent is a more recent ORM is maintained by two developers from Facebook and with the community.
The main difference between the two ones is that Ent uses code generation which means everything is typed creates a lot of helpers which makes Querying data and relations really easy and the querying system is really different.
Using Ent is much easier from my perspective and the API is safer. Ent also has better integration with GraphQL. For example, it supports the GraphQL Cursor Connections Specification while you will have to implement it by hand with Gorm.
But you have to understand that Ent is still in heavy development and hasn't reached v1 yet. Some companies include me use it in production and it's really stable but you have to understand the risks if you plan to use it in production.
We will use Ent to show you how easy is it to use it with a GraphQL API.
Creating our models
In this example project, we will keep our generated schema and created models based on it:
type Todo {
  id: ID!
  text: String!
  done: Boolean!
  user: User!
}

type User {
  id: ID!
  name: String!
}
We have two types: a
Todo and the User. So we will create these models with Ent. We will use go get to fetch the Ent module and then run the ent init command to create our User and Todo models.$ go get entgo.io/ent/cmd/ent $ go run entgo.io/ent/cmd/ent init User Todo
These commands will generate a new
ent folder at the root of your project. It will contain the generated code with everything related to the strictly typed ORM API. The only interesting files in the ent folder are located inside the ent/schema folder. This folder contains all the schema definitions of your models. You have to define your model fields with Go code. By default an empty schema is defined for
todo.go and user.go:package schema import "entgo.io/ent" // User holds the schema definition for the User entity. type User struct { ent.Schema } // Fields of the User. func (User) Fields() []ent.Field { return nil } // Edges of the User. func (User) Edges() []ent.Edge { return nil }
I recommend you read the official documentation to better understand how this schema works.
Then we just have to define our fields inside the
Fields method, starting with user.go:import ( .... "entgo.io/ent/schema/field" ) // Fields of the User. func (User) Fields() []ent.Field { return []ent.Field{ field.String("name"). MinLen(3). Unique(), } }
We define a
name field for our User that must be unique and the minimum length is 3. There is a ton of options, such as validation, minimum and max length, default value... I recommend you to read the documentation or to play with the autocompletion of your IDE to find the methods your need. By default, if we don't define an id field It will be generated by default with an auto-increment Integer as ID.Then we can create our
Todo model fields:import ( .... "entgo.io/ent/schema/field" ) // Fields of the Todo. func (Todo) Fields() []ent.Field { return []ent.Field{ field.String("text"). NotEmpty(), field.Bool("done"). Default(false), } }
And then we have to run the
ent generate command to generate all the types:$ go run entgo.io/ent/cmd/ent generate ./ent/schema
I will generate tons of files in the
ent folder for you. Remember that the only files you should care about in this folder are in the ent/schema folder.Good job, your models are now created. You now have created the database client to connect to your Database and start performing SQL requests. To get started we will be using a
sqlite3 database.We have to go edit our
main.go:package main import ( "context" "log" "net/http" "os" _ "github.com/mattn/go-sqlite3" "github.com/99designs/gqlgen/graphql/handler" "github.com/99designs/gqlgen/graphql/playground" "github.com/shellbear/go-graphql-example/ent" "github.com/shellbear/go-graphql-example/graph" "github.com/shellbear/go-graphql-example/graph/generated" ) const defaultPort = "8080" func newClient() *ent.Client { // Create a Sqlite3 database connection. client, err := ent.Open("sqlite3", "file:ent?mode=memory&cache=shared&_fk=1") if err != nil { log.Fatalf("failed opening connection to sqlite: %v", err) } // Run the auto migration tool. if err := client.Schema.Create(context.Background()); err != nil { log.Fatalf("failed creating schema resources: %v", err) } return client } func main() { port := os.Getenv("PORT") if port == "" { port = defaultPort } client := newClient() defer client.Close() srv := handler.NewDefaultServer(generated.NewExecutableSchema(generated.Config{Resolvers: &graph.Resolver{}})) http.Handle("/", playground.Handler("GraphQL playground", "/query")) http.Handle("/query", srv) log.Printf("connect to http://localhost:%s/ for GraphQL playground", port) log.Fatal(http.ListenAndServe(":"+port, nil)) }
We have to import
_ "github.com/mattn/go-sqlite3" to use our Sqlite3 database, and then we define a newClient function to open a sqlite3 database connection and run the database migrations (creating our models in the database).Then we store the
client inside a variable and call the defer Close method to close the database connection on server shutdown.We now have to pass this
client to our GraphQL resolvers so we can perform SQL requests inside our Queries or Mutations. To do so we have to update the graph/resolver.go file:package graph import "github.com/shellbear/go-graphql-example/ent" // This file will not be regenerated automatically. // // It serves as dependency injection for your app, add any dependencies you require here. type Resolver struct{ Client *ent.Client }
We had the
Client field in our Resolver struct. This structure will be shared across all our resolvers.And we update our main to pass the
client as parameter to the NewDefaultServer function:srv := handler.NewDefaultServer(generated.NewExecutableSchema(generated.Config{Resolvers: &graph.Resolver{ Client: client, }}))
That's it, we created our models, created a Database connection, and passed our Database client to the GraphQL resolver.
GraphQL + ORM
As I told you before, gqlgen will generated types that are not found. We generated an
ent.Todo model but in our graph/resolver.go.Todos we have the following function definition:func (r *queryResolver) Todos(ctx context.Context) ([]*model.Todo, error) { panic(fmt.Errorf("not implemented")) }
As you can see the function except for a
[]*model.Todo but we want to use our new model []*ent.Todo.To do so we have to update our
gqlgen.yml config and update the autobind field to resolve our ent types:# gqlgen will search for any type names in the schema in these go packages # if they match it will use them, otherwise it will generate them. autobind: - "github.com/shellbear/go-graphql-example/graph/model" - "github.com/shellbear/go-graphql-example/ent"
This will tell gqlgen to find our models generated with Ent and use them instead of generated new ones. Note that the names inside your GraphQL schema and Ent model have to be the same. If not you have to manually define them inside the
models fields like it is done for the ID and Int fields.Now we need to fetch the
ent/entgql module. It provides integration with the gqlgen framework we're currently using:$ go get entgo.io/contrib/entgql
We only defined our
Todo model fields but we didn't define a User field connection. To do so we have to go to our ent/schema/todo.go file and update the Edges.package schema import ( "entgo.io/contrib/entgql" "entgo.io/ent" "entgo.io/ent/schema/edge" "entgo.io/ent/schema/field" ) // Todo holds the schema definition for the Todo entity. type Todo struct { ent.Schema } // Fields of the Todo. func (Todo) Fields() []ent.Field { return []ent.Field{ field.String("text"). NotEmpty(), field.Bool("done"). Default(false), } } // Edges of the Todo. func (Todo) Edges() []ent.Edge { return []ent.Edge{ edge.To("user", User.Type). Unique(). Required(). Annotations(entgql.Bind()), } }
We create an Edge connection
to our User and make it Unique (there is only one user linked to a Todo) and Required (it must have a creator).Then we can also create a reverse relations, for example to fetch all the
Todo of an User inside ent/schema/user.go:package schema import ( "entgo.io/ent" "entgo.io/ent/schema/edge" "entgo.io/ent/schema/field" ) // User holds the schema definition for the User entity. type User struct { ent.Schema } // Fields of the User. func (User) Fields() []ent.Field { return []ent.Field{ field.String("name"). NotEmpty(). MinLen(3). Unique(), } } // Edges of the User. func (User) Edges() []ent.Edge { return []ent.Edge{ edge.From("todos", Todo.Type). Ref("user"), } }
We use the
From method to create a reverse relation, we specify the name we want and use the Ref which is the Todo edge To name we just defined.Create the following file
ent/entc.go:// +build ignore package main import ( "log" "entgo.io/contrib/entgql" "entgo.io/ent/entc" "entgo.io/ent/entc/gen" ) func main() { err := entc.Generate("./schema", &gen.Config{ Templates: entgql.AllTemplates, }) if err != nil { log.Fatalf("running ent codegen: %v", err) } }
And update the
ent/generate.go file:package ent //go:generate go run -mod=mod ./entc.go
And create the
graph/generate.go file:package graph //go:generate go run -mod=mod github.com/99designs/gqlgen generate
Now you can run the
go generate ./... command at the root of your project to both generate ent and gqlgen code generation.$ go generate ./...
We can now start implementing our
graph/schema.resolvers.go. Here is the full code:package graph // This file will be automatically regenerated based on the schema, any resolver implementations // will be copied through when generating and any unknown code will be moved to the end. import ( "context" "github.com/shellbear/go-graphql-example/ent/user" "github.com/shellbear/go-graphql-example/ent" "github.com/shellbear/go-graphql-example/graph/generated" "github.com/shellbear/go-graphql-example/graph/model" ) func (r *mutationResolver) CreateTodo(ctx context.Context, input model.NewTodo) (*ent.Todo, error) { // Fetch User based on UserName input parameter. usr, err := r.Client.User.Query().Where( user.NameEQ(input.UserName), ).First(ctx) // Check errors if err != nil { // If error is not not found, return the error. if !ent.IsNotFound(err) { return nil, err } // Otherwise create the User. usr, err = r.Client.User.Create(). SetName(input.UserName). Save(ctx) if err != nil { return nil, err } } // Create the new Todo. return r.Client.Todo.Create(). SetText(input.Text). // Set text SetUser(usr). // Set User Save(ctx) // Save it } func (r *queryResolver) Todos(ctx context.Context) ([]*ent.Todo, error) { // Returns all the Todo. return r.Client.Todo.Query().All(ctx) } func (r *queryResolver) UserTodos(ctx context.Context, name string) ([]*ent.Todo, error) { // Query all Users in database. return r.Client.User.Query(). Where( // Filter only User that exactly match the name parameter. user.NameEQ(name), ). QueryTodos(). // Query all Todos of the found User. All(ctx) // Returns all Todos. } // Mutation returns generated.MutationResolver implementation. func (r *Resolver) Mutation() generated.MutationResolver { return &mutationResolver{r} } // Query returns generated.QueryResolver implementation. func (r *Resolver) Query() generated.QueryResolver { return &queryResolver{r} } type mutationResolver struct{ *Resolver } type queryResolver struct{ *Resolver }
Playing with our API
Now you can run the server and start using our GraphQL API.
$ go run .
2021/06/23 19:55:48 connect to http://localhost:8080/ for GraphQL playground
We can execute the
createTodo mutation:mutation createTodo { createTodo(input: { text: "This is an example", userName: "user-1" }) { id text done user { id name } } }
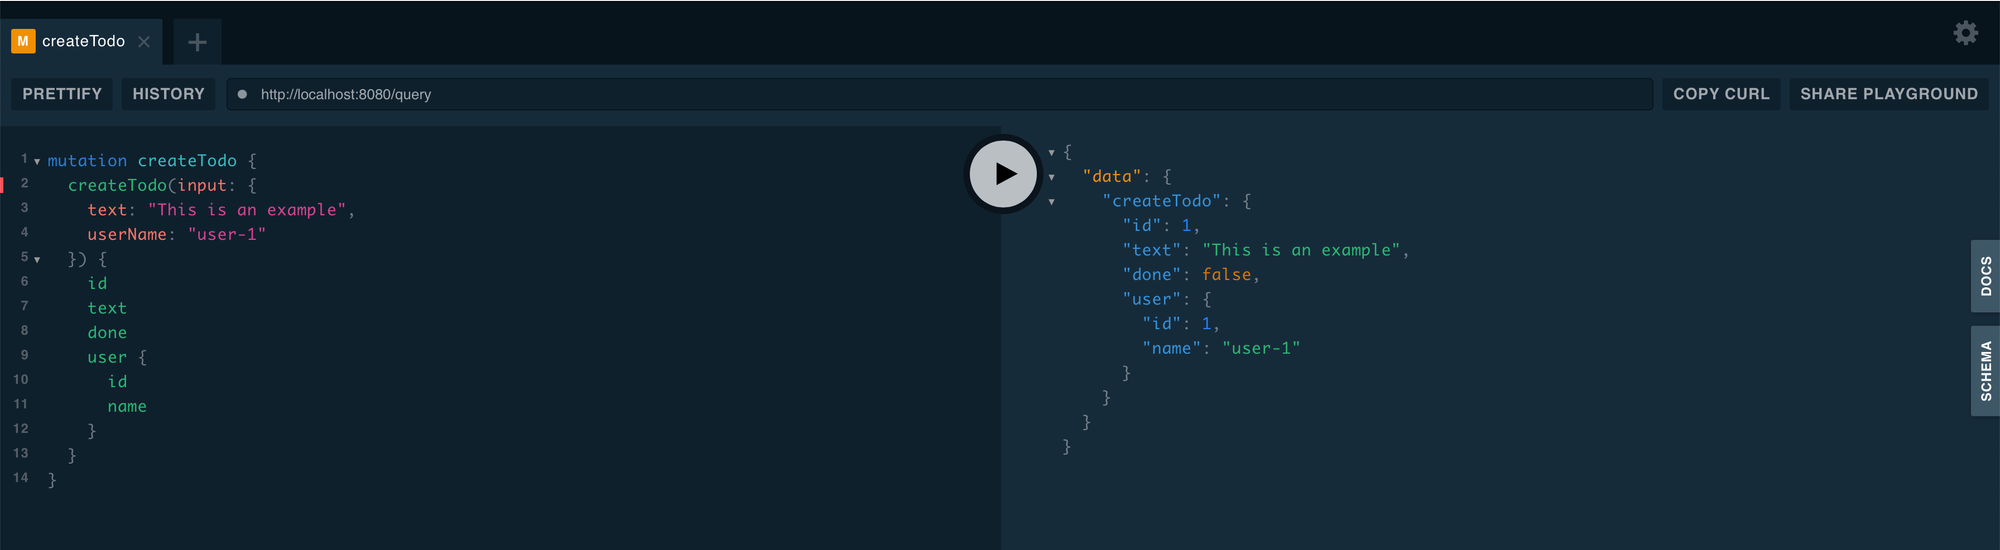
And we obtain the following response:
{
  "data": {
    "createTodo": {
      "id": 1,
      "text": "This is an example",
      "done": false,
      "user": {
        "id": 1,
        "name": "user-1"
      }
    }
  }
}
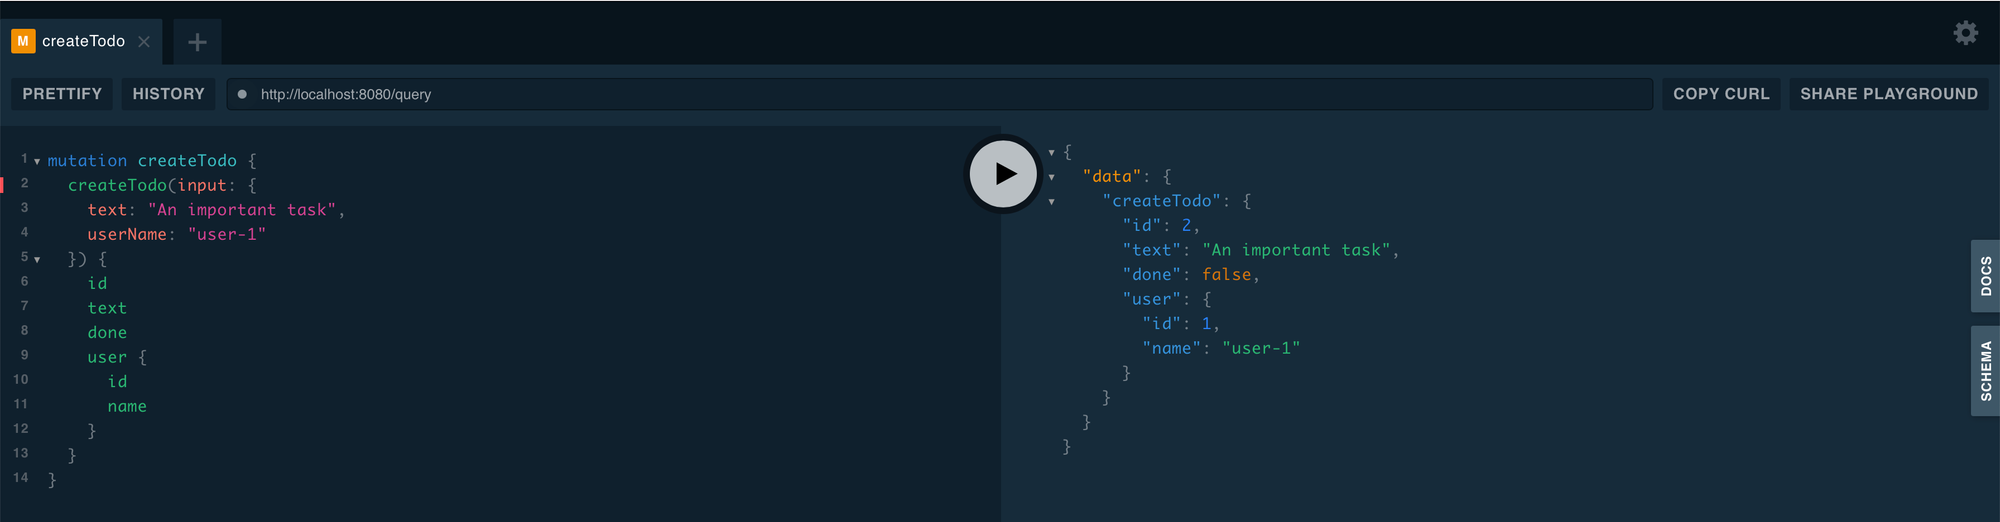
Everything works well! Let's create another
Todo with a different text:createTodo(input: { text: "An important task", userName: "user-1" }) { id text done user { id name } }
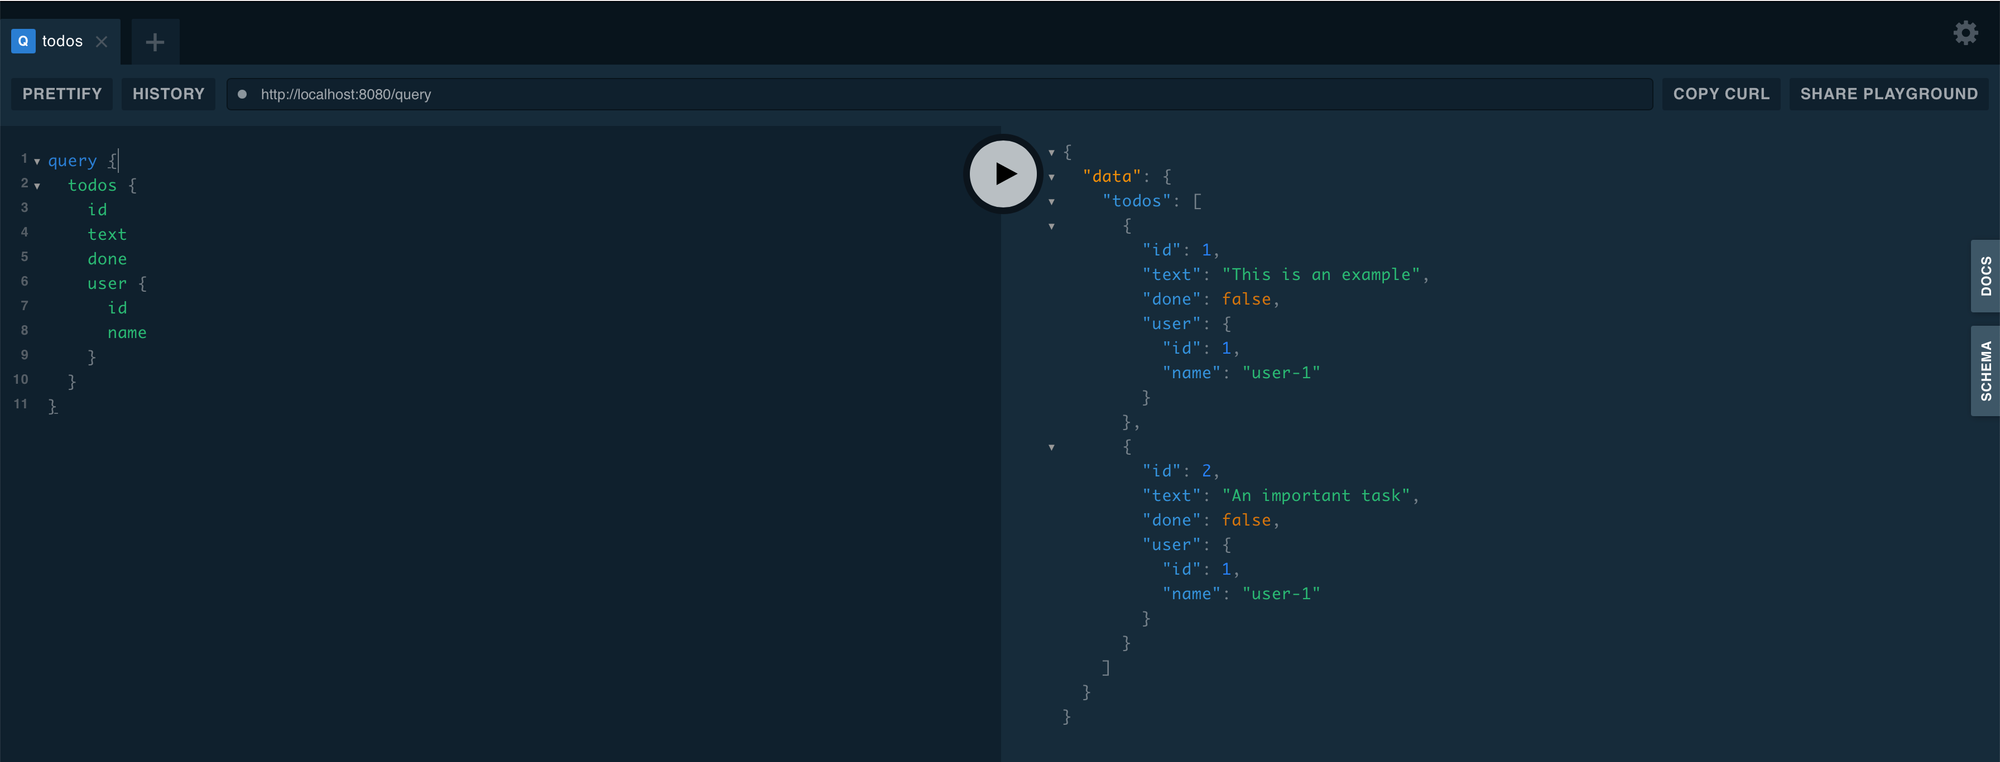
We can also query the
Todo:query todos { todos { id text done user { id name } } }
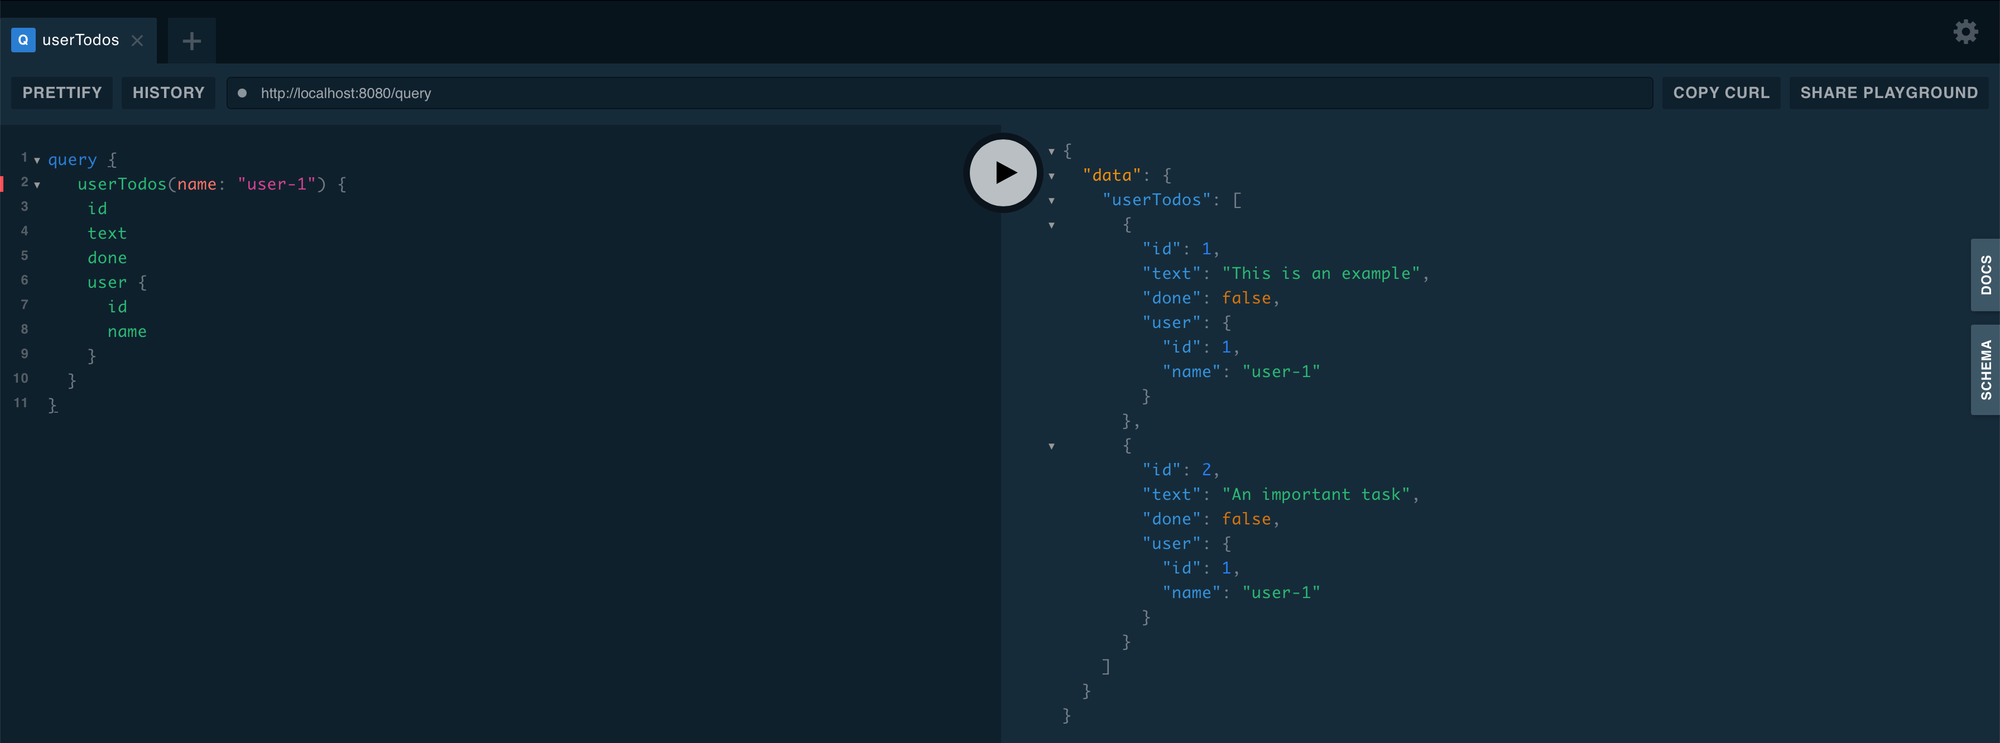
Or query the Query by our
User name field. If we specify our user name user-1 we get the list of its Todo:query { userTodos(name: "user-1") { id text done user { id name } } }
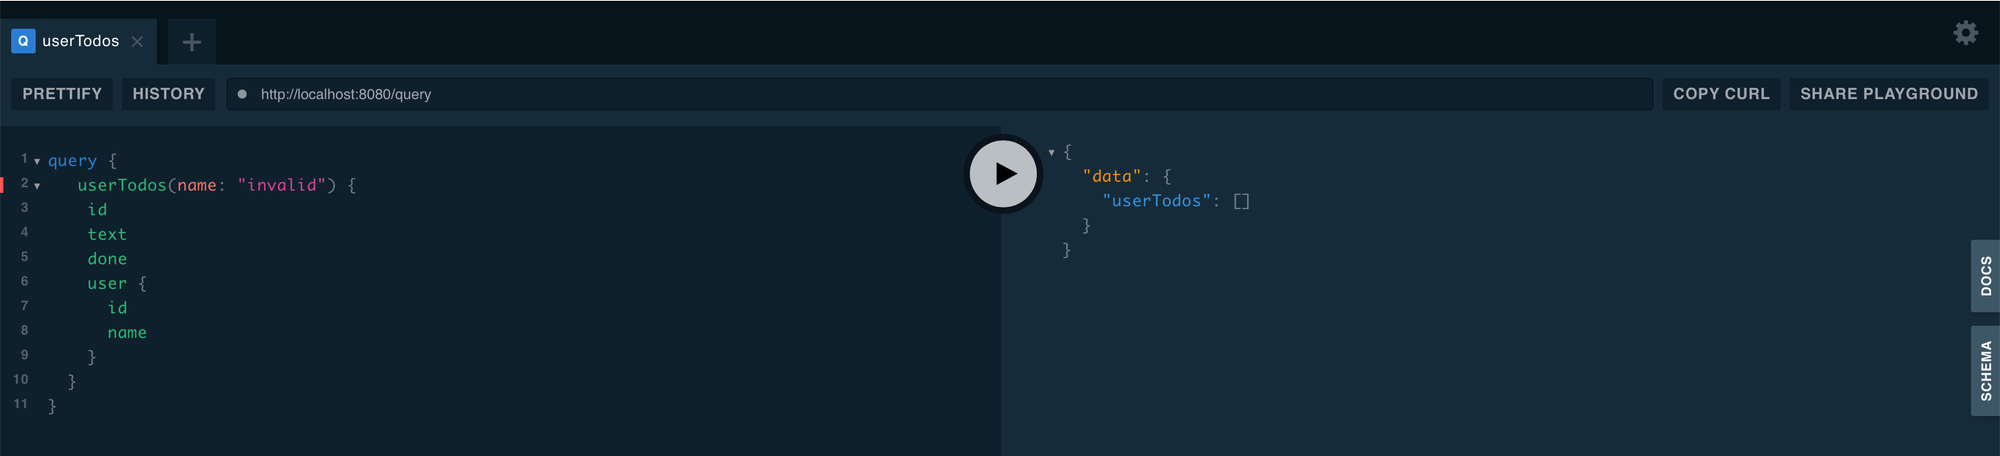
But if we put a non-existing user name the list is empty as it should be:
Final notes
As you saw, setting up a GraphQL API with Go can be a bit tricky. I tried to give you the best quick-start so you can create yourself an API with good practices and avoid the errors I made in the past.
Make sure to check the full code on my Github. Feel free to open an issue for any improvement or error you spotted!